The FloralPOS is already integrated with PayJunction. Simply follow the instructions below to connect The FloralPOS with your PayJunction account.
Process Overview
1. Create PayJunction API Credentials
- Log into your PayJunction account as an administrator. Then go to More, and select API Credentials.
- In the top-right corner of this view, click the Create New API Credential button.
-
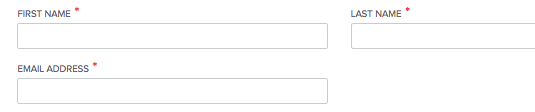
Enter a First Name, Last Name and an Email Address.
To ensure that report titles lineup properly between PayJunction and The FloralPOS, please use the following format:
- FIRST NAME: "FloralPOS"
- LAST NAME: nameOfYourBusiness (can be abbreviated if needed, just don't use spaces)
- EMAIL ADDRESS: noreply@payjunction.com
- Create a new unique Username and Password.
For the Username: Use the same First and Last name listed above separated by underscore (Ex: "FloralPOS_nameOfYourBusiness") .
For the Password: Use at least 8 characters, with at least one uppercase, one lowercase and one number. -
Select the account that will be used by The FloralPOS. Also select the account in the Default Credit Card Account drop-down.
- Click the Create button at the bottom of the page to save the new API credentials.
-
Adjust the security settings (AVS) for the API:
-
Click on More button on the lower left side of the screen.
-
Then click Accounts.
-
Select the account you want to work on.
-
The following steps need to be done for the PayJunction API
-
Choose the type of security settings you wish to toggle. We recommend set AVS to check "Bypass" and CVV to Enabled:
- Click Submit.
-
Click on More button on the lower left side of the screen.
-
Allow Keyed transaction on the Smart Terminal:
-
Click on More button on the lower left side of the screen.
-
Then click Smart Terminals.
- For each Smart Terminal, click on the Dots then in Edit:
- Check the Enable Keyed option, and click Submit.
-
Click on More button on the lower left side of the screen.
2. Save the PayJunction API in The FloralPOS.
- Log into your The FloralPOS as an administrator. Then go to Control Panel:
- Click on the System Configuration Tab:
- Click on Credit Card Setup:
- Go to the PayJunction Tab, click the Enabled and Smart Terminal toggle buttons, then type in the API Login and Password and click Save:
- Once an Administrator User has saved the API credentials, each user needs to select the Terminal Id (Batch) and Smart Terminal they will use on their station:
For additional details on how to use the The FloralPOS - PayJunction integration, please refer to the training videos:
Initial Setup:
Taking a Payment with the Smart Terminal:
Processing Keyed transactions or charging a Saved card:
In the transaction screen, disable the "Smart Terminal" toggle:
Type in Card number, expiration date, CVV and Zip code, or click on "SHOW CC' ON FILE":
If you have additional questions, please contact our support:
- PayJunction: 800-601-0230
- The FloralPOS: 888-865-9768