Before you start, confirm that your default settings are correct:
1. Click the gear icon (at the top) to go to your settings.
2. Smart Terminal: Select your Smart Terminal from the Select Smart Terminal field.
3. Merchant Account: Select your account from the Select Merchant Account field.
Table of Contents
1) Select the Smart Terminal payment method
- Go to the payment page in your software. The plugin will automatically open. Alternatively, click the PayJunction icon to manually open the No Code Payment Integration plugin.
- Select Smart Terminal from your list of payment options.
2) Enter payment details and click process
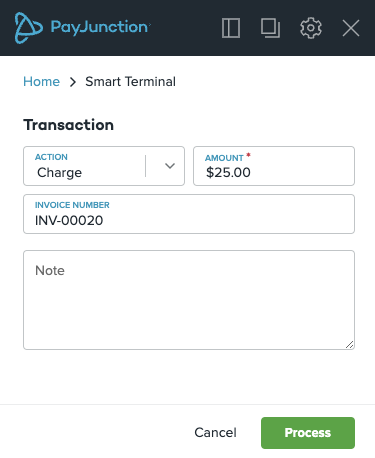
- The Amount field will automatically be populated with the total. Alternatively, the amount can be manually entered.
- If configured, the Invoice Number field will automatically be populated with the invoice number. Alternatively, the invoice number can be manually entered in the Invoice Number field.
- If configured, the Note field will automatically be populated with a note. Alternatively, a note can be manually entered in the Note field.
- Click Process.
3) Charge the card and update your software
- The Smart Terminal will prompt the customer to Chip, Tap, or Swipe their card.
- The plugin provides a real-time progress report for the transaction
- When the payment is approved, the plugin will automatically make the necessary updates to your software (if this is configured).
Alternatively, if an automation is not configured, the plugin will simply display the result of the transaction (approved, declined) and you can manually update your software to mark the invoice (i.e. bill, etc) as complete. - Payment complete. Click the Complete button to go back to the main page.