NetSoft Studio is integrated with PayJunction. Simply follow the instructions below to connect Netsoft Studio with your PayJunction account.
Step 1: Create PayJunction API Credentials
- Log into your PayJunction account as an Administrator, go to More, then select API Credentials.
- In the top-right corner of this view, click the Create New API Credential button.
- Leave the User Type set to "Unrestricted Credential"
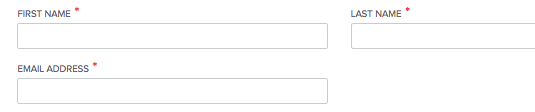
- Enter a First Name, Last Name and an Email Address
To ensure that report titles lineup properly between PayJunction and NetSoft, please use the following naming convention:- FIRST NAME: NetSoft
- LAST NAME: Name of the location or business unit (no spaces).
-
EMAIL ADDRESS: noreply@payjunction.com
-
Create a new unique Username and Password.
For the Username: Use the same First and Last name listed above, without spaces.
For the Password: Use at least 12 characters, with at least one uppercase, one lowercase and one number. - Click the Submit button at the bottom of the page to save the new API credentials
Need Help? Click Here for more detailed instructions to create new API Credentials in PayJunction.
Step 2: BizWizard Order Manager Setup
IMPORTANT: YOU MUST DO THIS ON EVERY WORKSTATION
-
STEP 1
- Login to Order Manager Admin Account.
-
Click on Configuration Tab.
-
Click on System Setup.
-
On General System Setup window, click on PayJunction Setup tab.
-
Map Payment Type to Payment Method fields (as shown in the screenshot below).
-
Select AVS and CVV options. Zip Code Match and CVV ON is recommended.
- Click Done.
-
STEP 2
-
Click on the Configuration tab.
-
Click on Workstation Setup.
-
On Workstation Setup window, go to the PayJunction API Credentials section.
- Enter your API Username (API credentials -Step 1 above)
- Enter your API Password (API credentials -Step 1 above)
- Click on the Test Login button to ensure successful connection with PayJunction.
- If you have a Smart Terminal, or multiple Smart Terminals, select which Smart Terminal to use for this workstation.
- Click Done.
-
Step 3: BizWizard ShopKart Setup
- Login to ShopKart Admin Account.
-
From the Main Menu, click on the Payment Card Processing Configuration icon.
-
Complete the Payment Card Processing Configuration form:
- Processor, select PayJunction.
- Process Transactions?, select Yes.
- Web Access API Login, enter your API Username (API credentials -Step 1 above)
- Password, enter your API Password (API credentials -Step 1 above)
- Test Mode?, select No
- Processing Type, select Authorize and Capture
- Click Update Payment Card Processing Configuration button to complete the integration.
BizWizard Training Video
How to Process Transactions with PayJunction Smart Terminal
For additional assistance, please contact:
- PayJunction support: 800-601-0230 / support@payjunction.com
- NetSoft Studio Support: 775-996-1343