nAbleMD POS System is integrated with PayJunction. Simply follow the instructions below to connect nAble with your PayJunction account and Smart Terminal.
Process Overview
- Activate PayJunction Smart Terminal.
- Create PayJunction API Credentials.
- Create PayJunction Hosted Payments
- Configure PayJunction as payment Type in nAble
1. Activate PayJunction Smart Terminal
Instructions to activate PayJunction Smart Terminals can be found here:
2. Create PayJunction API Credentials
-
Login to your PayJunction account as an administrator, go to More, then select API Credentials.
-
In the top-right corner of this view, click the Create New API Credential button.
-
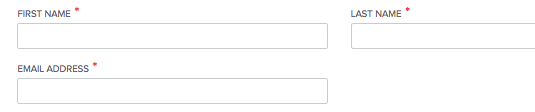
Enter a First Name, Last Name and an Email Address
To ensure that report titles lineup properly between PayJunction and nAbleMD, please use the following naming convention:- FIRST NAME: Number or nickname assigned to the nAble Register
- LAST NAME: nAble_nameOfYourBusiness
-
EMAIL ADDRESS: noreply@payjunction.com
-
Create a new unique Username and Password.
For the Username: Use the same First and Last name listed above, without spaces.
For the Password: Use at least 12 characters, with at least one uppercase, one lowercase and one number. - Select the account that will be used by the nAble Register. Also select the account in the Default Credit Card Account drop-down.
- Click the Submit button at the bottom of the page to save the new API credentials
3. Create PayJunction Hosted Payments
- After logging into PayJunction as an administrator go to More and click on Hosted Payments
-
Click on the New Shop button in the top right corner of this view
- Enter in a unique Shop Name and select the Account it should use. If you have more than one location, name your shop: nAble_HP_nameOfLocation
- In the Email section, the first field is to be notified when a new Hosted Payment occurs, and the second is for the Customer's Receipt.
- In the Security section, select CAPTCHA VERIFICATION On After Decline.
-
Submit button at the bottom of this view
4. Configure PayJunction as payment Type in nAble
- Log into your nAble account as an Administrator.
-
In the main Menu on the left, select SETTINGS -> Patient Billing Settings -> Billing Setup Payment Types.
-
Scroll down to "PayJunction Setup" section.
- Type in the PayJunction API credentials in the fields labeled "PayJunction Username" and "PayJunction Password" then click in "Update PayJunction Account". That will allow nAble to fetch your PayJunction account details.
- Type in the PayJunction Hosted Payment in field labeled "PayJunction Shop Name" and select a value from the "Default Account" dropdown.
- The Smart Terminal(s) should automatically be listed, you just need to assign a Location from the "Installed Location" dropdown.