VMX POS is already integrated with PayJunction. Simply follow the instructions below to connect VMX with your PayJunction account.
Process Overview
1. Create PayJunction API Credentials
-
Log into your PayJunction account as an administrator. Then go to More, and select API Credentials.
-
In the top-right corner of this view, click the New API Credential button.
-
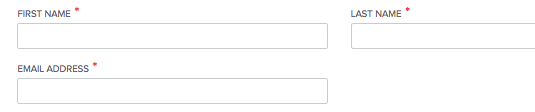
Enter a First Name, Last Name and an Email Address.
To make activity generated through the VMX integration easy to identify in PayJunction, we recommend using the following naming convention:- FIRST NAME: "VMX"
- LAST NAME: nameOfYourBusiness (can be abbreviated if needed, just don't use spaces)
-
EMAIL ADDRESS: noreply@payjunction.com
-
Create a new unique Username and Password.
For the Username: Use the same First and Last name listed above separated by underscore (Ex: "VMX_nameOfYourBusiness") .
For the Password: Use at least 12 characters, with at least one uppercase, one lowercase and one number.
-
Select the account that will be used by VMX. Also select the account in the Default Credit Card Account drop-down.
- Click the Create button at the bottom of the page to save the new API credentials.
2. Save the PayJunction API Credentials in VMX.
- Log into VMX with an Administrator User.
-
On the upper right part of the screen, click on: More > Admin.
-
Click on Configuration, then Credit Card.
-
Scroll down to the PayJunction section and type the API credentials created in step 1-4
- Click on Save.
If you're having trouble connecting the terminal to VMX, contact (706) 666-5566.