CrossLink is integrated with PayJunction. Simply follow the instructions below to connect CrossLink with your PayJunction.
Process Overview
I. Activate your Smart Terminals
II. Create PayJunction API Credentials (in PayJunction)
III. Save the API credentials in CrossLink
IV. Process a Smart Terminal transaction using CrossLink
V. Activate CrossLink Ecom Wallet
I. Activate PayJunction Smart Terminals
Instructions to activate PayJunction Smart Terminals can be found here:
Smart Terminal Installation Setup
II. Create PayJunction API Credentials
-
Log into your PayJunction account as an Administrator, go to More, then select API Credentials.
-
In the top-right corner of this view, click the Create New API Credential button.
- Leave the User Type set to "Unrestricted Credential"
-
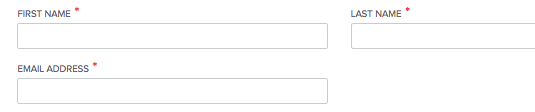
Enter a First Name, Last Name and an Email Address
To ensure that report titles lineup properly between PayJunction and CrossLink, please use the following naming convention:- FIRST NAME: CrossLinkAPI
- LAST NAME: Name of the location or business unit (no spaces).
-
EMAIL ADDRESS: noreply@payjunction.com
-
Create a new unique Username and Password.
For the Username user ID: suggestion concatenate the same First and Last name listed above, without spaces.
For the Password: Use at least 12 characters, with at least one uppercase, one lowercase and one number. - Click the Create button at the bottom of the page to save the new API credentials
III. Save the API credentials in CrossLink
Type the API Login and Password created in step II-5, click Save and Next:
At this point, your integration is completed.
IV. Process a Smart Terminal transaction using CrossLink
The next part of this tutorial is simply to show how to process a Transaction through CrossLink:
- While in an active tax return click the Payment button on the top ribbon:
- Please select PayJunction on the Payment Details section of the Dialog box:
If you skipped step III, please type in the PayJunction API user and Password at this time:
- Once logged in they user may select their Terminal(Account) and SmartTerminal in case they have more than one setup in their office and process the payment:
- Once “Process Payment” is selected the smart terminal of choice will light up for payment:
Once payment is processed the response will be recorded to the tax return.
V. Activate CrossLink Ecom Wallet
If you are planning to use the Ecom Wallet (for ACH transactions), please visit the article below a additional instructions:
Save the API credentials in CrossLink Ecom Wallet
For additional assistance, please contact PayJunction support: 800-601-0230